December 10, 2022

Buttermilk Brownies


If you like rich and fudgy brownies with lots of frosting, then this recipe is for you.  These brownies are soft and chewy and the thick and creamy frosting is the perfect topping.  

I normally wouldn't think about brownies when it comes to Christmas treats, but hey, I guess if you add some pretty festive sprinkles, it'll turn anything into a Holiday recipe.  Plus, I never turn down chocolate. 

These brownies are delicious!

You might also like:

Buttermilk Brownies

(Printable Recipe)

1/2 c. unsalted butter

1/4 c. unsweetened cocoa powder

1/2 c. vegetable oil

2 c. sugar

2 large eggs

1/4 c. buttermilk

1 tsp. vanilla extract

2 c. all-purpose flour

1 tsp. baking soda

1/2 tsp. kosher salt

1 c. semi-sweet chocolate chips

Preheat oven to 400 degrees.  Line a 9x13-inch baking pan with parchment paper; set aside.  For the brownies, in a small saucepan, over medium heat, combine the butter, cocoa powder and vegetable oil.  Melt butter and bring to a boil and then remove from heat.  In a large mixing bowl, combine the sugar, eggs, buttermilk and vanilla.  Slowly whisk in the melted butter mixture.  Add in flour, baking soda and salt and stir until just combined.  Fold in the chocolate chips.  Pour into prepared baking dish and bake for 19-20 minutes.  Remove from oven and allow to cool while you make the frosting.  


Buttermilk Frosting:

1/2 c. unsalted butter

1/2 c. buttermilk

1/4 c. unsweetened cocoa powder

1 tsp. vanilla

4 c. powdered sugar

In a small saucepan, combine the butter, buttermilk and cocoa powder.  Melt butter and bring to a boil.  Remove from heat.  In a medium mixing bowl, add the powdered sugar.  Pour the melted butter mixture over the powdered sugar and add the vanilla.  Whisk together until combined and pour over slightly cooled brownies.  Spread out evenly.  Refrigerate for at least two hours, until set.  Cut and enjoy. 

adapted from: Shugary Sweets

November 27, 2022

No-Churn Peppermint Ice Cream


I was at the grocery store the other day and when I went down one of the aisles, I was hit with an overwhelming peppermint scent.  It suddenly gave me a craving for peppermint ice cream.  It's been a long time since I've bought peppermint ice cream and I had to have some. . . but the store didn't have any. Soooooo, I made my own and it turned out SO DANG GOOD! It's probably even better than store-bought.  

It's so easy to make.  All you do is whip some heavy creamy with flavorings and then add in a can of sweetened condensed milk and crushed peppermint candy canes.  Fold it all together and allow to freeze until firm.  The easiest homemade ice cream.  


I've made several versions of this no-churn ice cream and it never disappoints.  It turns out thick and pillowy and creamy and it's so easy to make.  The key with this peppermint ice cream is to not go overboard with the peppermint extract.  A little goes a looooong way and you don't want your ice cream tasting like toothpaste.  Also, make sure and crush your candy canes well enough, so you don't have huge crunchy pieces in your creamy ice cream.  A little crunch is good, but not too much.  

You can also make this ice cream using a tub of whipped topping instead of the whipped heavy cream, but I prefer the texture of the whipped heavy cream slightly more.  

You  might also like:

No-Churn Peppermint Ice Cream

From: Jenn@eatcakefordinner

(Printable Recipe)

2 c. heavy whipping cream, cold

1/4 tsp. + 1/8 tsp. peppermint extract, or more to taste

2 tsp. vanilla extract

1 (14 oz.) can sweetened condensed milk 

2/3 c. crushed peppermint candy canes


In the bowl of a stand mixer, combine the cold cream, peppermint and vanilla extracts.  Whip cream until stiff peaks form.  Fold in the sweetened condensed milk and crushed candy canes (reserve just a little candy cane for topping).  Pour into a 9x5-inch loaf pan and sprinkle with the reserved candy canes, cover with plastic wrap or foil and freeze for several hours or until firm.  Makes around 6 servings.  

November 11, 2022

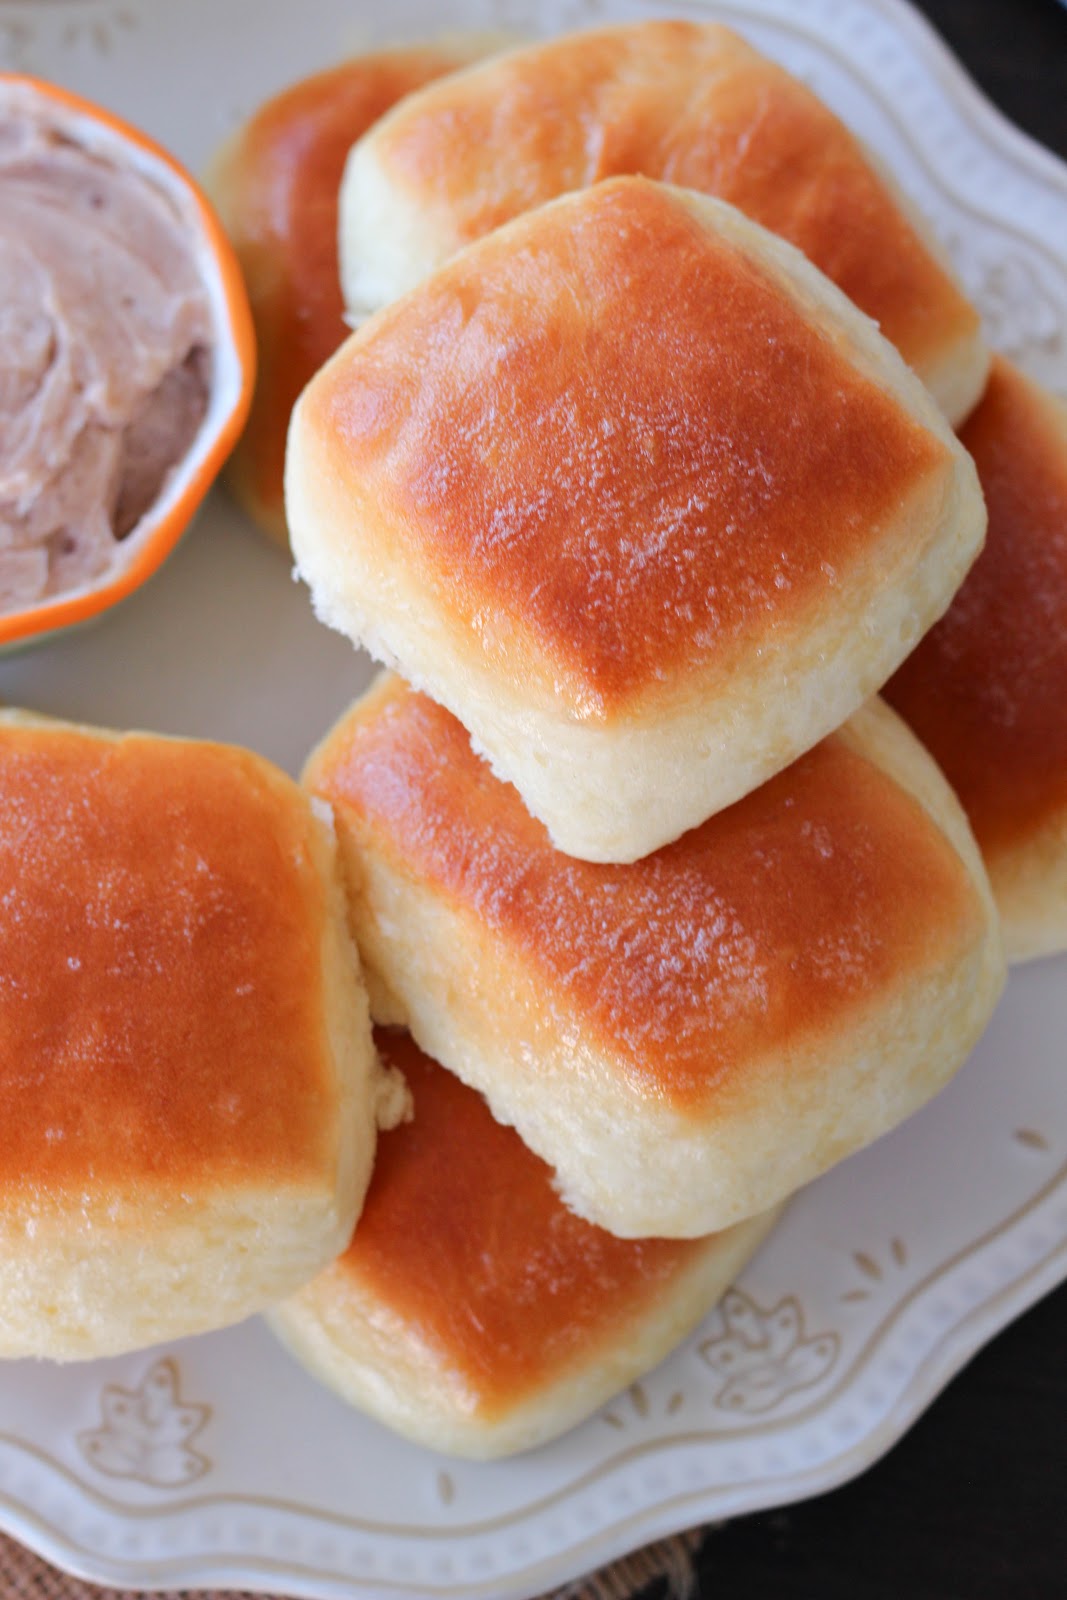
Copycat Texas Roadhouse Rolls


This recipe was originally posted back in 2011 and it's one of my post popular recipes on the blog.  It was time for some updated photos.  

Here is the original post:
Whoever created the roll recipe at Texas Roadhouse is a genius and whoever decided to give them to guests as a "complimentary appetizer" is a genius.  What is the first thing you hear from people when they talk about Texas Roadhouse?  I hear "I love their rolls," I have never heard anyone start out by saying "I love their pulled pork sandwich," have you?  Don't get me wrong, they have really good food too, but their rolls are unbeatable.  

I found this copycat recipe floating around the blog world and I couldn't wait to give them a try.  Honestly, I was extremely skeptical about these.  Why?  Texas Roadhouse uses a "roll mix" to make their rolls, so I doubt anyone, other than the creator, knows the real recipe.  They also use a combination of butter and margarine (I read the package on the butter the baker was adding to the mix and that is what it said).  I wanted to try them anyway, because secretly, I was hoping maybe they would at least kinda taste like them?
Well. . . . Did they taste like the real thing . . . . Mine did NOT taste anything like Texas Roadhouse's. However, they turned out really really good.  They are way too soft, light and fluffy to be Texas Roadhouse's.  I must say, I have no complaints about these rolls.  I love super soft rolls.  So, if you want a good roll recipe, you can't go wrong with these.  Serve with cinnamon honey butter


Texas Roadhouse Rolls - Copycat Recipe

4 tsp. active dry yeast
1/2 c. warm water
2 c. milk, scalded and cooled to lukewarm
3 Tbl. of melted butter, slightly cooled
1/2 c. sugar plus 1 tsp.
6-7 c. all purpose flour
2 large eggs
2 tsp. salt

Dissolve yeast in warm water with a teaspoon of sugar; let stand until frothy.  Combine yeast mixture, warm milk, 1/2 cup sugar and enough flour to make a medium batter (about the consistency of pancake batter).  Beat thoroughly.  Add melted butter, eggs and salt.  Beat well.  Add enough flour to form a soft and slightly sticky dough.  Using the dough hook of a stand mixer, knead until soft and silky, about 4-5 minutes.  Cover and let rise in a warm place until double in size.  Punch down.  Turn out onto a floured board.  Divide into portions for shaping; let rest 10 minutes.  Shape dough into desired forms.  Place on greased baking sheets.  Let rise until doubled.  

Bake at 350 degrees for 14-15 minutes or until golden brown.  Brush immediately with butter.  Yield: around 2 1/2 - 3 dozen rolls.  Serve with Cinnamon Honey Butter.  

*Jenn's Notes: I shaped my rolls by rolling out the dough into a rectangle, about 1/2-inch thick, then I folded the rectangle in half, making it about 1-inch thick. I used  my rolling pin and rolled over the dough, ever so gently, just to seal the two halves together.  I then used a dough scraper and cut the rolls into squares and placed those on my greased baking sheet.  

December 4, 2021

No Roll Sour Cream Sugar Cookies

Everyone could use a no roll sugar recipe.  I have another one on the blog, but it doesn't use sour cream. 

 This is the kind of cookie that gets better and better as days go by.  

I have to admit, the first day when I made these cookies, I wasn't blown away by them.  I gave them another try on day two and they were delicious.  They had softened up a bit and the flavor had developed.  Same thing on days three and four . . . they were yummy. 

They are soft and slightly chewy and have just the right amount of sweetness when topped with a creamy vanilla frosting. I stuck with vanilla extract in both the cookies and frosting, but a little almond extract would also be amazing.  

Here are a few tips to have delicious and successful sugar cookies:
1.  Don't add too much flour.  This dough will be sticky and that's a good thing.  It's not meant to be rolled out, so you want it sticky.  If you add too much flour, they will be dry.
2.  Do not over bake.  Get them out of the oven when they still look underdone.  If you wait until they look done, they will be dry.  
3.  When you use a room temperature cookie sheet, you will get thick soft cookies.  If you use a warm cookie sheet, that has just come from the oven, your cookies will be more flat.  

You might also like: 

No Roll Sour Cream Sugar Cookies

1/2 c. unsalted butter, room temperature
2 c. sugar
4 large eggs
2 tsp. vanilla extract
2/3 c. sour cream
1/2 tsp. baking soda
1/2 tsp. salt
3 tsp. baking powder
4 c. all-purpose flour

Preheat oven to 350 degrees.  In a large mixing bowl, cream together softened butter and sugar using an electric mixer.  Add the eggs and vanilla and mix until just incorporated.  Mix in the sour cream.  Add the baking soda, salt, baking powder and flour and mix until just combined.  Dough will be sticky.  Drop by heaping Tablespoons onto a large greased baking sheet, 12 dough balls per baking sheet.  

Bake for 10-11 minutes or until edges are lightly golden, do not overbake.  Cookies will look underdone. Allow to cool on cookie sheet for a few minutes, then transfer to a wire rack to cool completely.  Repeat with remaining dough.  When cooled, top with frosting.  Makes about 3 1/2 dozen cookies.  

Cookie recipe adapted from: The Recipe Rebel

Buttercream Frosting
From: Jenn@eatcakefordinner

2 sticks unsalted butter, room temperature
pinch of salt
2-3 tsp. vanilla extract, to taste
5 c. powdered sugar
milk, only if needed

Combine softened butter, salt and vanilla in a large mixing bowl and beat until creamy.  Add powdered sugar, one cup at a time, until you get a thick and creamy frosting.  If it's too thick for your liking, you can add a tiny bit of milk.  Spread over cooled cookies and garnish with sprinkles, if desired.  


November 22, 2021

My Go-To Dinner Rolls

These have been my go-to rolls for the past several years.  They are delicious, they turn out great every time and they don't require any kneading or rolling out which is always a win in my book.  They have a slightly sweet flavor, the texture is so soft and flaky and plus . . . they are big.  
I'm always a fan of big rolls :)
I originally posted these back in 2011.  Here is the original post: 

These have been declared the World's Best Dinner Rolls by the authors of Our Best Bites.  That was a pretty smart move on their part to name their rolls the world's best, because with a title like that, you can't help but give them a try.  Did they live up to that title?  

These are incredible.  They taste just like another roll that I make, that I absolutely love.  They are so soft and very very easy to make.  They are great plain, with butter, with honey and I think they would make a perfect little sandwich with some ham and cheese.  The recipe recommends using whole milk and when I went to the store, I planned on buying whole milk, but the smallest carton they had was a one gallon size and I was planning on cutting the roll recipe in half, so I couldn't justify buying a whole carton of whole milk when I was only planning on using one cup and not knowing of anything else I could make with the whole milk.  So, I didn't buy it and I ended up using 2% and these rolls were amazing.  If they taste even better than this with the whole milk, then I have got to try it, because I was so impressed with these.  


My Go-To Dinner Rolls
adapted from: Our Best Bites

2 c. whole milk*
1/2 c. plus 1 Tbl. sugar, divided
1/3 c. unsalted butter
2 tsp. kosher salt
2 pkgs. (4 1/2 tsp.) active dry yeast
2/3 c. warm water
8-9 c. all-purpose flour, divided
3 large beaten eggs

*Whole milk is recommended, but if you're in a pinch 2% milk will work, but try to stay away from 1% or skim.

Combine milk, 1/2 cup sugar, butter and salt in a medium saucepan.  Heat over medium heat until butter is melted.  Remove from heat and allow to cool until lukewarm (this is really important, because if it is too hot, it will kill the yeast).  

While the milk mixture is cooling, dissolve the yeast and 1 Tablespoon of sugar in warm water.  Let stand about 10 minutes.  If the yeast hasn't bubbled, you'll need to repeat this step with new yeast.

In a large mixing bowl, combine 3 cups of flour and milk mixture.  Beat on low for 30 seconds, scraping sides of bowl constantly.  Add yeast mixture and beat on high for 3 minutes.  Add beaten eggs.  Stir in as much of the remaining flour as needed to make a soft dough.  This dough should be very soft and sticky- it will be coming away from the sides of the bowl, but it will still stick to your finger when you touch it.  (If you add too much flour, these rolls will be heavy and dense).  Place the bowl in a warm place and cover with a clean towel; allow to rise until doubled, about 1 hour.

Punch down dough.  Lightly flour your work surface and turn dough out onto surface.  Divide in half.  Spray two 9x13-inch glass pans with cooking spray.  Pat first portion of dough into a rectangle and then cut into 12 equal-sized pieces.  Shape each piece into a ball and place in prepared pan.  Repeat with remaining dough in the second pan.  Cover with a clean cloth and allow to rise in a warm place for about 30 minutes or until doubled in size.  When dough has about 15-20 minutes to go, preheat oven to 375 degrees.  Bake for 16-17 minutes or until golden brown.  When done, remove from oven and rub a stick of cold butter over the tops of the rolls until each roll is covered in butter. 

Jenn's Notes:  I cut this recipe in half and got 12 rolls.  I used 2 eggs and 4 cups of flour total.  When you are done mixing, the dough is still pretty sticky, but it firms up during the rising process and was very easy to work with.  During the second rise, my rolls took longer than 30 minutes, more like 45 minutes.  So, plan a little extra time, just in case.  These rolls were still delicious and very soft the next day, but I couldn't tell you about the 3rd day, because I didn't have any left.  

***Update - I have made these rolls a lot since this post.  They have become my new go-to roll recipe, because they are so easy and turn out perfect every time.  I have made them with both 2% milk and whole milk and I think they are delicious both ways.  I bake mine for 17 minutes.***


May 22, 2021

No-Churn Strawberry Ice Cream


Hi Friends, it's been a long while since I've been around.  How are all of you? I'm doing well, just busy with every day stuff.

I've been seeing commercials from a fast food joint advertising a strawberry cheesecake shake that basically says it's the best thing ever and will change your life.  I finally gave in and got one and you know what . . . it wasn't that great.  

I wanted some real strawberry flavor and I didn't get that.  I did however go overboard with the strawberries last time I went to Costco, so I figured I could use those and make some ice cream that actually has amazing fresh strawberry flavor. 

This ice cream turned out incredible.  I was blown away by the delicious real strawberry flavor.  The best part is, you don't even have to drag out the ice cream maker for it.  With only a few basic ingredients, you get a delicious, smooth and creamy ice cream with very little effort.  Just make sure you use nice ripe strawberries for the most strawberry flavor.  It's also amazing when topped with sliced bananas.  Oh my!

Right after you mix everything together, it will be very soft, but it firms up nice when frozen. 

You might also like:

Three-Ingredient Peach Sherbet

Strawberry Oreo Frozen Fruit Dessert

Burnt Almond Fudge Ice Cream

Strawberry Gooey Butter Cookies

Frozen Strawberry Watermelon Lemonade


No-Churn Strawberry Ice Cream

From: Jenn@eatcakefordinner

(Printable Recipe)

1 (14 oz.) can sweetened condensed milk

2 tsp. vanilla extract

1 (16 oz.) carton fresh ripe strawberries, washed, dried and hulled

3 Tbl. sugar, or a little more if you like it extra sweet

2 c. cold heavy cream

In a blender, puree the strawberries with the sugar until nice and smooth.  Pour into a large bowl along with the sweetened condensed milk and vanilla and whisk to combine.  In a separate large bowl, beat the heavy cream until stiff peaks form.  Gently fold the whipped cream into the strawberry mixture until combined.  Pour into a freezer-safe container, cover with plastic wrap and freeze until firm.  I like to freeze mine in a 9X5-inch loaf pan.  It will fill the loaf pan and have a little extra for a small bowl.  


LinkWithin